Jumping back in some creative fun – I’ve had a bit of a break while work has been super busy but now I’m enjoying joining the hops and creating some pretty unusual cards and projects.
Join me as I “hop” with the Stampin with Friends gang and walk you through using this technique to make a “Step Card”
To get this card started, I have used the Pumpkin Pie cardstock and cut the A4 sheet in half so it measures 21cm x14.9 cm. See the diagram below for cutting and scoring and I will explain underneath – it might look confusing but its quite easy.
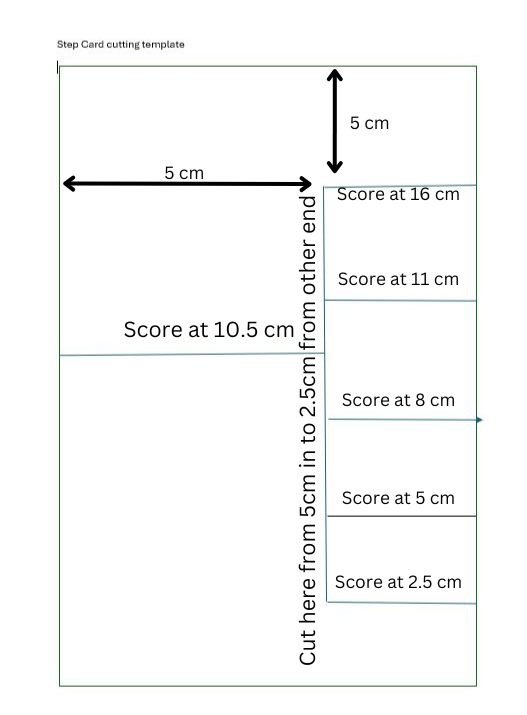
I used my paper trimmer ann placed the short side along the top, measured to 5 cm and then placed the cutting blade down 5 cm (you are not cutting from the top – the cut starts 5 cm down from the top). Insert the blade into the card stock and cut the cardstock until you are 2.5 cm from the bottom of the card.
Now turn the cardstock so that the long edge is against the top of the trimmer. Using the scorer, score the cardstock as indicated. Sop there will be one score line above the cut and 5 score lines below it. These should now fold up like a consertina so the card can fold.

I have the cut the following carstock:
Basic White – 8 x 10cm and 5.5cm x 9 cm
Pumpkin pie 6 x 15 cm (score at 9.5 cm)
A piece of Designer series paper (i’ve used the Fruit Salad 6 x 6 ” paper from the new Sale A Bration Catalogue)
And scraps of the DSP to fussy cut and decorate.
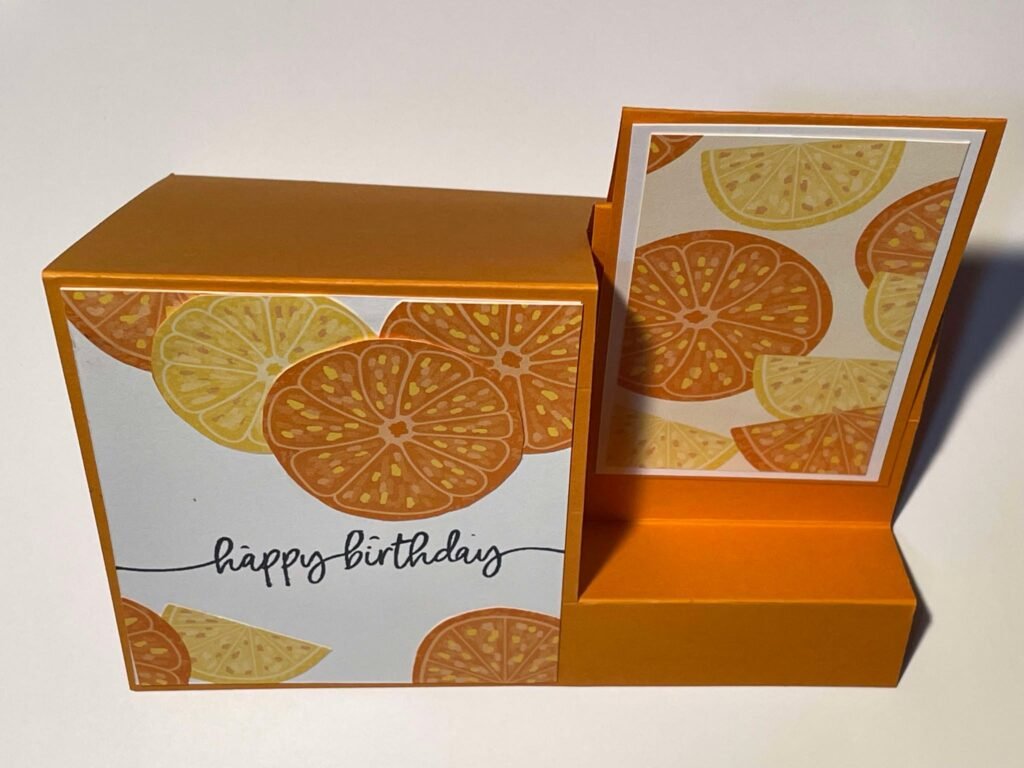
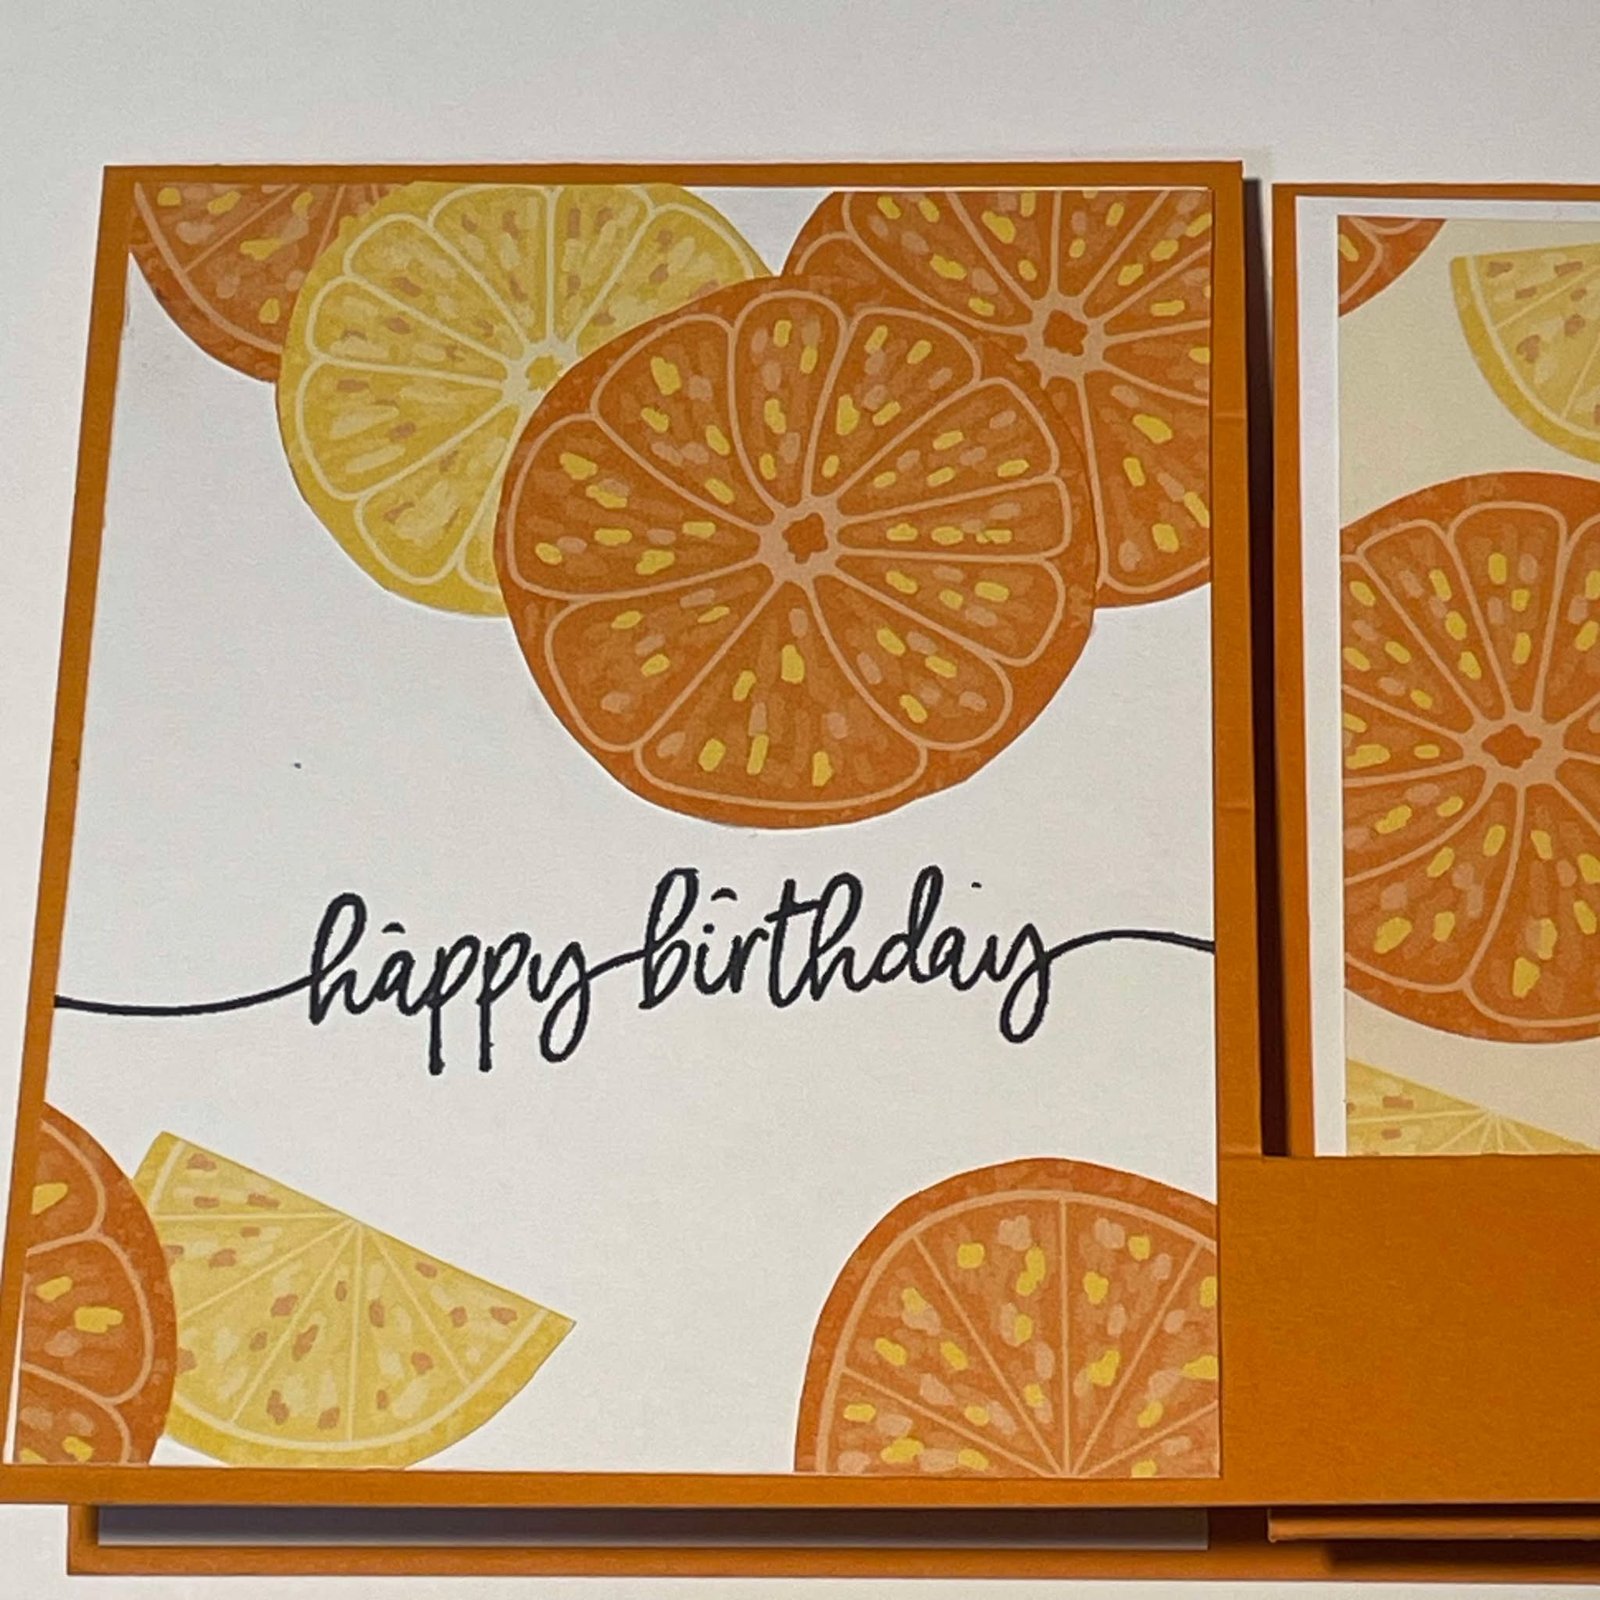
Once you have decorated the white cardstock as you like, stamp on a sentiment and attach to the card front. The card will stand up on its own with the “steps” adding some depth.
To follow along with the rest of the gang, you will find the links below:
If yuo’d like to use the products I have used – you will find a list of all the supplies below:
Product List

")


Love the oranges! 🍊
Its my favourite colour lol
Love your card Deb, what a great way to use this dsp x
Thank you Mo